Which Hammer is Used for Riveting?
Riveting is one of the most important techniques used to join or assemble metal parts. So what kind of hammer should you use for driving rivets?
When it comes to finding a riveting hammer, there are many options; however, selecting the right one is important for effective completion of all your projects. Here in this guide, we put together the features and types of hammers that you can work with for doing different sorts of jobs related to riveting.
Why Use a Riveting Hammer?
A claw hammer and a riveting hammer are not the same. The main difference is that a riveter hammer is made specifically for installing rivets into metal. It has a flat and smooth face perfect for hitting the rivet head with precision.
Also important fact is, that it features an absorbent handle to concentrate the hit power on the rivet while smoothing and compressing it at the same time.
If you use a basic claw hammer for this operation, you might fail to strike with enough efficacy, cause mushrooming of the rivet heads, or cause damage on the workpiece itself, compromising some of its aesthetic.
If you are willing to spend less than 15 dollars, or just buy the cheapest riveting hammer, the final product will look non-professional and weak.
Common Types of Riveting Hammers
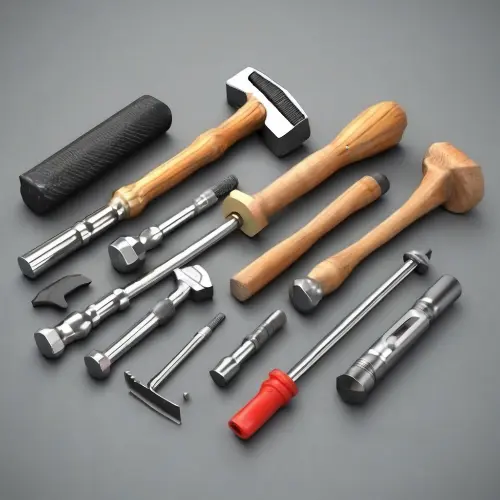
There are three main types of hammers designed for riveting:
Flat Head Riveting Hammer
This standard style has a flat striking face and cross-peen opposite the handle. The flat face provides an ideal smooth surface for spreading rivet heads. The cross-peen allows forming heads on both tubular and solid shank rivets.
Dome Head Riveting Hammer
Featuring a domed striking face, this style concentrates force for setting heavy-duty or large rivets. The dome shape causes the metal to spread evenly. They come in various sizes from 2 oz. to 16 oz. or more.
Set Hammer Riveting Hammer
Designed for aerospace and industrial applications, these have a flat face and offset handle. The shape improves leverage and swing control for installing flush rivets in hard-to-reach spots.
What to Look for When Buying a Riveting Hammer
Keep these key factors in mind when selecting a riveting hammer:
- Head Weight – Heavier heads provide more striking force. Lighter heads allow for more precision and control. Choose accordingly.
- Head Shape – Flat or domed faces have different uses. Make sure it matches your riveting needs.
- Handle Length– Shorter handles give you better leverage in tight spaces. Longer handles maximize swing force.
- Handle Material – Wood absorbs impact but can split over time. Metal and fiberglass are more durable options.
- Face Smoothness – A perfectly smooth face prevents marring or damaging the workpiece when striking.
- Rebound Control – Some hammers have an internal mechanism to prevent rebound. This allows rapid striking.
Pro Tips for Using a Riveting Hammer
Once you have the right riveting hammer, follow these tips:
- Use moderate, controlled swings. Don’t overswing as that can damage the workpiece.
- Hold it close to the base for more control and accuracy when striking the rivet.
- Keep your elbow locked for solid impact transfer through the handle to the head.
- Strike repeatedly in the exact center of the rivet head for even spreading.
- Let the hammer do the work. Allow its weight to provide the needed force.
- Lubricate metal hammer faces occasionally with light oil to prevent chipping or spalling.
Key Takeaways
- Choose riveting-specific hammers with flat, smooth striking faces to prevent workpiece damage.
- Match the head size and weight to your specific riveting application for the best results.
- Proper hammer technique and control are crucial for straight, clean rivets.
- Investing in a quality riveting hammer is worth it for consistent professional results.
Using the right hammer makes all the difference in completing metal fabrication and repair projects requiring riveting. With this guide’s help, you can confidently select and wield the perfect riveting hammer.
FAQs
Here are some common questions about riveting hammers:
What’s the difference between a riveting hammer and a normal claw hammer?
Riveting hammers have a smooth, flat face designed specifically for striking rivet heads without damaging the surrounding material. Claw hammers are not suitable for riveting work.
Which hammer is best for light-duty/small rivets?
A 2 to 4-ounce flat-head riveting hammer is ideal for smaller rivets. The lighter weight gives you precision and control.
Can I use a ball peen hammer instead?
It’s not recommended. Ball peen hammers lack the flat face and rebound control needed for proper riveting work. The rounded edges can also mar the workpiece.
What about using a plastic/rubber mallet?
While softer mallets won’t damage the material, they lack the force needed to properly set rivets. Use them only for very light riveting applications.
How do I smooth rivet heads with the hammer?
Use moderate taps while rotating the hammer around the perimeter of the rivet head to flatten and smooth it out evenly.
Conclusion
Having the right riveting hammer is essential for professional quality rivet work. Matching the hammer’s weight, shape, and features to your specific application allows for proper rivet setting without damaging the surrounding material.
While claw hammers and mallets may seem suitable, invest in a real riveting hammer for the best results. With practice and the tips provided here, you can become adept at using a riveting hammer to create strong, long-lasting riveted connections.

I’m Ian Welkins, a seasoned professional in the tools industry. My passion drives me to share valuable insights on hammers, drills, and industrial tools. With years of experience, I’m your trusted source for expert advice on the best tools for every job.
