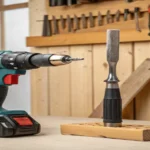
If you’ve ever found yourself holding a Milwaukee hammer drill and wondering, “Can a Milwaukee hammer drill be used as a regular drill?”, you’re not alone.
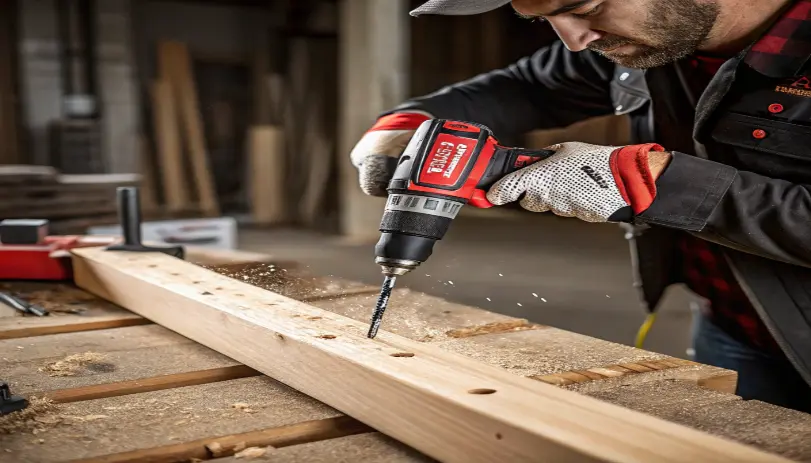
Quick answer: Yes, a Milwaukee hammer drill can be used as a regular drill. Simply switch it to the non-hammer mode, and it will function like a standard drill, allowing you to work on softer materials like wood, plastic, or metal effectively.
This question often pops up among DIY enthusiasts and professionals alike. Hammer drills are known for their power and durability, especially when tackling tough materials like concrete.
But can they handle everyday drilling tasks on softer materials like wood or metal just as effectively?
In this article, we’ll explore whether a Milwaukee hammer drill can double as a regular drill, its advantages, and tips for seamless usage.
Why Should You Care About This Guide?
Let’s be honest – power tools aren’t cheap, and nobody wants to buy more tools than necessary.
I’ve learned through countless job sites and home projects that understanding your tools inside and out can save you both money and storage space.
Plus, who doesn’t love getting more bang for their buck?
The Basics: What Makes Your Milwaukee Hammer Drill Special?
I remember my first day on a construction site, totally confused about why my mentor insisted on using a hammer drill for some tasks and a regular drill for others.
Here’s what I’ve learned over the years:
Think of a hammer drill like a boxer – it doesn’t just spin (like a regular drill), it also punches forward thousands of times per minute.
This combination of rotation and hammering is what makes it such a beast when dealing with tough materials like concrete or brick.
“I used to burn through regular drills trying to mount fixtures in concrete walls until I discovered the magic of hammer drills. Game changer!” – Mike, my old construction mentor
Real Talk: Can You Use It as a Regular Drill?
You bet your tool belt you can! Here’s the cool part – Milwaukee designed these tools with a mode selector (usually a little dial or switch on the top). It’s like having two tools in one:
Mode 1: Regular Drill Mode
- Perfect for wood, metal, and plastic
- Smooth, controlled drilling
- Just like your standard drill
Mode 2: Hammer Mode
- Tackles concrete and masonry
- Adds that hammering action
- Gets through tough stuff like butter
Let’s Talk Materials: What Works Where?
After years of trial and error (and yes, some mistakes), here’s my tried-and-true material guide:
Hammer Mode Materials:
- Concrete walls and floors
- Brick facades
- Stone pathways
- Block foundations
- Hard tile
Regular Mode Materials:
- Kitchen cabinets
- Metal sheets
- Wooden decking
- Plastic fixtures
- Drywall installations
The Real-World Performance Comparison
I’ve put together this comparison based on actual job site experience:
| Feature | Milwaukee Hammer Drill | Standard Drill |
| Weight | A bit heavier (3-4 lbs) | Lighter (2-3 lbs) |
| Price Range | $150-300 | $80-200 |
| Versatility | Handles everything | Limited on masonry |
| Battery Life | 3-4 hours of heavy use | 4-5 hours typical use |
| Best For | All-around work | Light-medium tasks |
Smart Mode Selection: A Project-Based Guide
Let me share some real-world scenarios I’ve encountered:
Kitchen Remodel Project:
- Cabinet installation → Regular mode
- Tile backsplash holes → Hammer mode
- Under-cabinet lighting → Regular mode
Deck Building:
- Wood planks → Regular mode
- Concrete footings → Hammer mode
- Metal railings → Regular mode
Understanding SDS Technology in Modern Drilling
The SDS (Slotted Drive System) technology has revolutionized how we approach heavy-duty drilling.
Unlike traditional chuck systems, SDS bits lock into place with a specialized mechanism that allows for both rotary and hammering motion while preventing bit slippage.
This system is particularly valuable when working with rotary hammers and professional-grade hammer drills, offering superior performance for extensive concrete work.
Comparing DeWalt 20V vs Milwaukee M18 Platforms
When it comes to cordless hammer drills, the battle between DeWalt’s 20V MAX and Milwaukee’s M18 platforms reveals interesting differences.
DeWalt’s system excels in torque delivery and ergonomics, while Milwaukee’s platform often leads in battery life and durability.
Both systems offer comprehensive tool ecosystems for home improvement enthusiasts and professionals alike.
The Evolution of Drill Bit Technology
Modern drill bits have evolved significantly, especially for drilling in concrete and hard materials.
Today’s masonry drills feature specialized carbide tips and flute designs that work efficiently with both hammer action and standard rotation.
The development of impact-rated bits has also changed how we approach tough materials, allowing for longer bit life and cleaner holes.
Power Requirements: Corded vs Cordless Options
While cordless hammer drills offer mobility, corded drill options still maintain advantages for certain applications.
A corded hammer drill typically delivers consistent power output ideal for extended concrete drilling sessions.
However, advances in battery technology, particularly in 18V and 20V platforms, have narrowed this performance gap significantly.
Specialized Applications and Tool Selection
For occasional use and softer materials, a standard hammer drill might suffice.
However, when tackling projects requiring numerous holes in brick or concrete, a dedicated SDS hammer tool becomes invaluable.
The key is matching the tool’s capabilities to the job’s demands – whether you need an SDS tool or can manage with a standard hammer drill depends largely on the scope and frequency of your masonry work.
Advanced Features in Modern Drill Systems
Today’s drill drivers incorporate sophisticated electronics that optimize performance based on material resistance. Features like electronic clutches and impact action sensors help prevent overdriving and material damage
These smart-systems particularly benefit users when transitioning between hard materials like concrete and softer materials like wood or drywall.
The Impact Driver Question: What’s the Difference?
People often ask me about impact drivers versus hammer drills. Here’s the simple breakdown:
Impact Driver:
- Think of it like a tiny wrench that turns fast
- Great for driving screws
- Not great for drilling holes
Hammer Drill:
- More like a jackhammer meets a regular drill
- Perfect for drilling holes in anything
- Can also handle screws pretty well
Keeping Your Tool Happy: Maintenance Tips
After destroying my first hammer drill (lesson learned!), here’s what I do to keep my tools running smoothly:
- Clean after every use (especially masonry work)
- Keep the chuck lubricated
- Store in a dry place
- Check and tighten any loose parts monthly
- Use the right bits for the job
Real-Life FAQ From My Workshop
Will my regular bits work in hammer mode?
A: No way! You’ll destroy them. Use masonry bits for hammer mode.
Does the hammering wear out the drill faster?
A: Only if you’re using it wrong. These tools are built for it.
What about battery life?
A: Hammer mode drinks more juice. I always keep a spare battery charged.
Pro Tips From Years of Experience
- Start holes in masonry without hammer mode first
- Let the tool do the work – don’t lean on it
- Use the side handle for better control
- Keep your bits sharp
- Listen to your drill – it’ll tell you when something’s wrong
Safety First – Lessons Learned the Hard Way
Trust me, I’ve learned some of these the hard way:
- Always wear eye protection (caught dust in my eye once – never again!)
- Use ear protection in hammer mode
- Keep a firm grip – these tools can kick
- Watch for hidden pipes and wires
- Take breaks during big jobs
The Money-Saving Aspect
Here’s why investing in a Milwaukee hammer drill makes sense:
- Replaces two tools
- Built to last (mine’s 6 years old and counting)
- Versatile enough for most jobs
- Saves time on tough materials
- Reduces the need for multiple batteries and chargers
Final Thoughts from the Field
After thousands of holes drilled and countless projects completed, I can confidently say that a Milwaukee hammer drill can serve as your regular drill. It’s become my go-to tool for almost everything.
Remember:
- Match the mode to your material
- Use the right bits
- Let the tool do the work
- Maintain it properly
- Stay safe
“The best tool is the one you know how to use properly.” – Words I live by in my workshop
Final Thoughts
I hope this guide helps you get the most out of your Milwaukee hammer drill. Remember, practice makes perfect, and don’t be afraid to start with simple projects before tackling the big stuff.
Happy drilling! [This guide comes from years of hands-on experience, countless projects, and yes, a few mistakes along the way. Use it wisely, and your Milwaukee hammer drill will serve you well for years to come.]

I’m Ian Welkins, a seasoned professional in the tools industry. My passion drives me to share valuable insights on hammers, drills, and industrial tools. With years of experience, I’m your trusted source for expert advice on the best tools for every job.
